Understanding Inspection and Metrology

Inspections in the manufacturing process are often used for compliance or non-compliance matters. The equipment used is able to detect any abnormalities such as deviation in surface finish, quality, and dimensionality. Through inspection, you can detect abnormalities in the part which would otherwise be imperceptible to the human eye.

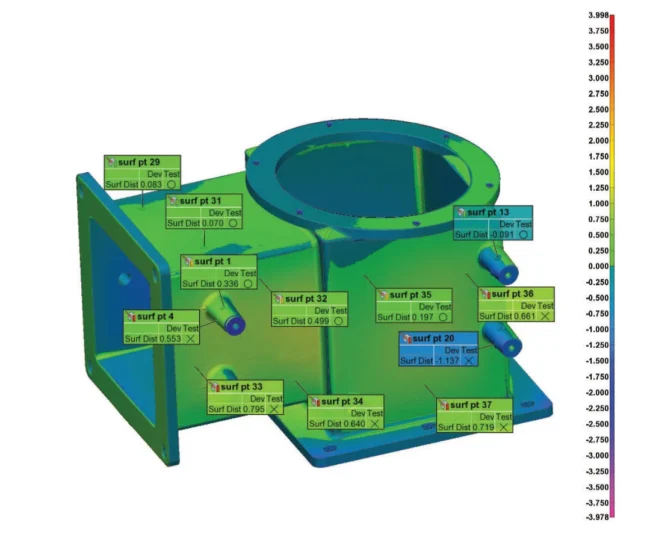
However, the process does not predict where defects will take place but rather highlights them for addressing in part revisions prior to manufacturing. If several defects are found they can be directly compared to CAD data, and an analysis sheet can be created highlighting the deviations from the original design. What this ensures is that when you go to manufacture your parts, they are within your engineering specifications, enabling you to avoid massive retooling or reworking costs associated with poor part manufacturing.

Metrology pertains to quality assurance methods used to calibrate the machines used during the production process to measure the subject parts. Metrology is often co-related to measurement, but it involves a more in-depth process that factors inaccuracy and errors as well as the mechanisms and performance of the metrology equipment being used. If there are no pattern measurements found within a specific range, a manufactured device is considered to be defective as it does not operate within its design specifications. This in turn requires the part to be reworked and revised to meet the desired specifications.

Getting To Know Key Metrology Terms

This is the As-built condition of the part in question. Referring to the actual dimensions throughout a part or assembly as they were manufactured. In the Reverse Engineering world as-built parts represent the part in its manufactured state including any imperfections or attributes from the manufacturing processes used.

The difference in collected data points when compared to the average or trend of the entire set of data.

The master model used as reference for all subsequent iterations. Reference models are also used in scan-based inspection to verify the manufacturing methods of a part. 

Measurements of specific data points, usually lengths, widths or volumes in order to compare the results to another object or previous forms. 

These are the limits in errors allowed through the version of part being tested.

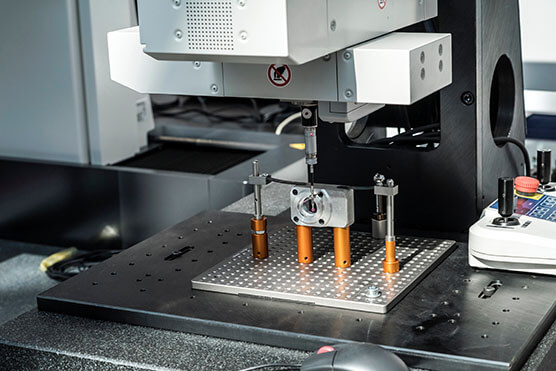
This is a tool usually a multi access arm or handheld probe which is used to collect data points across a part or product in order to compare the results to standards of accuracy.

One of the most common if not most common terms in metrology this is inspection performed on parts in the beginning of there production cycle. This is done to check all the dimensions, to verify the manufacturing process before proceeding with full scale manufacturing.

This is the precise quantity of what is being measured.

 The process of using a known artifact such as, ball bars or reference spheres in order to measure the true accuracy of a metrology device. This is essential to ensuring your inspection results are accurate. 

A point of data that has been acquired which lies outside of the normal scope of the data set it is part of. Usually, an anomaly or artifact on the part.

Is the process of confirming the part in questions passes all requirements set in place by the customer.

The upper and lower limits in deviation allowed from the originally designed parts and its technical drawing. The technical drawing will indicate these values for manufacturing purposes.

The deviation in measurements obtained by an operator using the same measurement device on the same part and the same feature multiple times.

One millionth of a meter, this unit of measurement is often used in metrology.

Benefits of Inspection and Metrology Services

benefits

Inspection and metrology are essential processes for manufacturing. These processes are established during various critical phases of manufacturing to ensure a certain yield can be maintained and confirmed. Inspection and metrology are also able to detect any defects early on during the manufacturing process to prevent huge financial losses prior to investing in long-term production quantities.

benefits

The manufacturing industry requires more than just high accuracy and high resolution. It needs 100% inspection to be done at high speeds to ensure results can be achieved according to schedule. Apart from detecting defects, inspection is also critical in addressing inaccurate measurements which need to be corrected at an earlier stage. Early corrections can reduce manufacturing risks which may lead to further defects and losses later on in the manufacturing process.

Why Choose Kemperle Industries?

At Kemperle Industries, we possess in-depth knowledge that can transform your ideas into reality. Our main objective is to deliver exceptional service so you can achieve optimal results for your business. Regardless of the scale of your project, we have the necessary resources to get it up and running in no time. We fully utilize state-of-the-art equipment that can easily convert designs into successful manufactured goods. We have the ability to provide a wide array of perspectives to ensure your individual business needs are met.

Designed To Perfection

Take The Next Step, And Start Your Project With Us.

Request a Quote